node-libgpiod examples
Some samples of what you can do combining node ecosystem and sensors. All samples bellow assumes that you did the environment setup correctly.
Web Blinker
You can put a node server running a small page which offers a nice button to make a led blink in no time:
mkdir web-blinker
cd web-blinker
npm init -y
npm i node-libgpiod
# use 'express@4' if node version on the SBC is too much old
npm i express
npm i alpinejs
touch index.js
mkdir public
touch public/index.html
Define the html page and the script:
<!DOCTYPE html>
<html>

<head>
  <style>
    body {
      background-color: black;
      color: white;
      text-align: center;
      padding-top: 50px;
    }

    h1 {
      font-size: 48px;
    }

    p {
      font-size: 24px;
    }
  </style>
  <!-- alpine.js -->
  <script defer src="cdn.js"></script>
</head>

<body x-data="{ blinking: false }">
  <h1>Web Blinker</h1>
  <p>This is a simple web blinker application.</p>
  <button @click="blinking = !blinking ; fetch(`api/led/${blinking ? 'on' : 'off'}`)">
    Blink
    <span x-show="blinking">ON</span>
    <span x-show="!blinking">OFF</span>
  </button>

</html>// index.js
const express = require('express');
const gpio = require('node-libgpiod');
const app = express();
const chip = new gpio.Chip(3);
app.use(express.static('public'));
app.use(express.static('node_modules/alpinejs/dist'));
app.get('/api/led/:state', (req, res) => {
const { state } = req.params;
console.log(`Received request to turn LED ${state}`);
try {
const v = state === 'on' ? 1 : 0;
const led = chip.getLine(20);
led.requestOutputMode();
led.setValue(v);
led.release();
res.json({ status: `LED turned ${state}` });
} catch (error) {
console.error('Error controlling LED:', error);
res.status(500).json({ error: 'Failed to control LED' });
}
});
app.listen(3000, () => {
console.log('Web Blinker app listening on port 3000');
});There, a simple web interface using modern javascript, simple like that.
Device ui
Another cool example is this web ui for all device details.
It's like gpioinfo, gpioget and gpioset but served over the network.
mkdir device-ui
cd device-ui
npm init -y
# use 'express@4' for older node versions
npm i express pug htmx.org bulma node-libgpiod
mkdir -p views/{layouts,pages,partials,components,controls}
touch index.js
touch views/layouts/base.pug
touch views/pages/index.pug
touch views/pages/chip.pug
touch views/partials/pin.pug
touch views/components/gpio-chip.pug
touch views/controls/pin-active-state.pug
touch views/controls/pin-consumer.pug
touch views/controls/pin-direction.pug
Bulma CSS framework provides a nice and modern look and feel, htmx gives dynamic behavior in a declarative way and pug eases the creation of interface components.
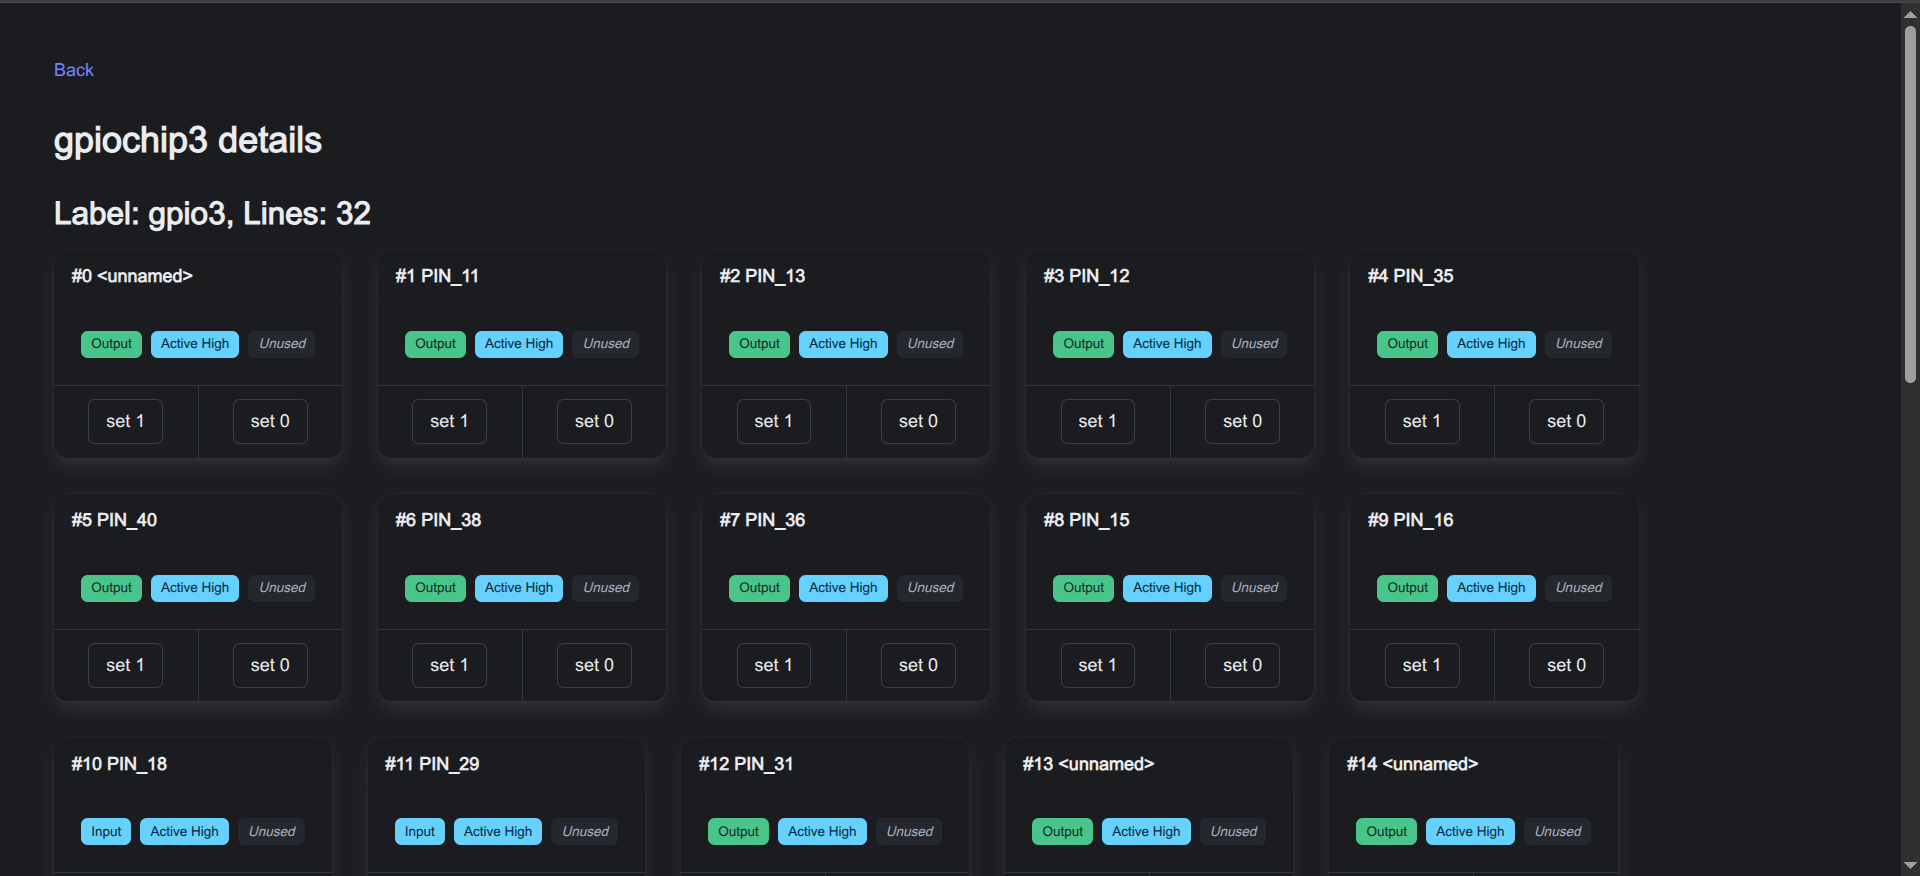
For example, this pug template renders the chip details page:
//- pages/chip.pug

extends ../layouts/base

include ../components/gpio-pin

block content
  .section
    a(href="/") Back
    h1= `${chip.name} details`
    h2= `Label: ${chip.label}, Lines: ${chip.lines.length}`
    .is-flex.is-flex-wrap-wrap.is-gap-4
      each line in chip.lines
        .is-flex
          +gpio-pin(line)
    a(href="/") Back
The backend express handler providing the chip details follows:
//...
app.get('/chip/:name', (req, res) => {
  const chip = new gpio.Chip(req.params.name)
  const lines = []
  for (let i = 0; i < chip.numberOfLines; i++) {
    const line = chip.getLine(i)
    lines.push({
      chipName: chip.name,
      offset: line.offset,
      name: line.name,
      value: line.value,
      consumer: line.consumer,
      direction: line.direction,
      activeState: line.activeState
    })
  }
  res.render('pages/chip', {
    chip: { name: chip.name, label: chip.label, lines }
  })
})
The resulting page looks like this:
Check out the complete sample
Sensor message queue
Further reading
Uou can check the old examples